Groups.io is a convenient method for allowing multi-casting communication via e-mail. It is not the be all and end all of such services but as a free resource makes a good system. One of its primary drawbacks is that in the free offering there is a limit on the size of any attachments and files that are uploaded to the system.
To overcome this and indeed the restrictions placed on attachment size in conventional e-mail it is necessary to resort to a file transfer service or cloud disk space.
There are many such services available and if you have your own favourite we are not suggesting for a moment that you should consider switching, but if you are new to this sort of thing then what follows is a simple guide to using the WeTransfer service.
Before we get going it is perhaps useful to differentiate between a File Transfer Service such as WeTransfer and a Cloud Storage Service such as pCloud
Although both can be used to transfer files such as photographs, videos or documents they have different approaches and the choice of which one to use depends to a large extent on what services you are already signed up for and how long you want the information to be downloaded for.
The primary difference is how long files are available for, a File Transfer Service such as WeTransfer only keeps the files for a limited period of time. Typically the free versions of the service limit availability to 7 days although paid for commercial versions of the same service extend this period. By contrast a Cloud Drive is what it says it is, it’s an amount of disk space on a remote server that you use in much the same way as you would a portable hard drive on your computer. Files saved there will remain there until you delete them and in most cases you can share the files or directories with selected people who operate the same Cloud Storage service or you can ask the system to provide a link to allow anyone with the link to download the file or view the folder content.
Most, if not all, Cloud Storage Services offer a client that you install on your PC, laptop, tablet or phone to allow you to use the same files on multiple devices and to use the Cloud Storage seamlessly without having to bother about a web browser. Be careful though, not all Cloud Storages support all Operating Systems and some limit the number of devices that can be registered so make sure you do your homework.
By contrast a File Transfer Service is just what it says, you upload things, get a link and send the link in an e-mail, IM or other message system and the person at the other end uses the link to download the information. Simple, no client software to install, no need to check on disk space, no need to worry about updating the files to the latest versions since they’ll be automatically deleted after the time limit, it’s OS agnostic “fire and forget”.
Uploading to WeTransfer
- Locate a PC, laptop, tablet or phone that has access to the files you would like to Transfer. In this example we’re going to use a Laptop running Ubuntu 18.04 LTS with the Budgie Desktop but the sequence of operations is equally applicable to any device.
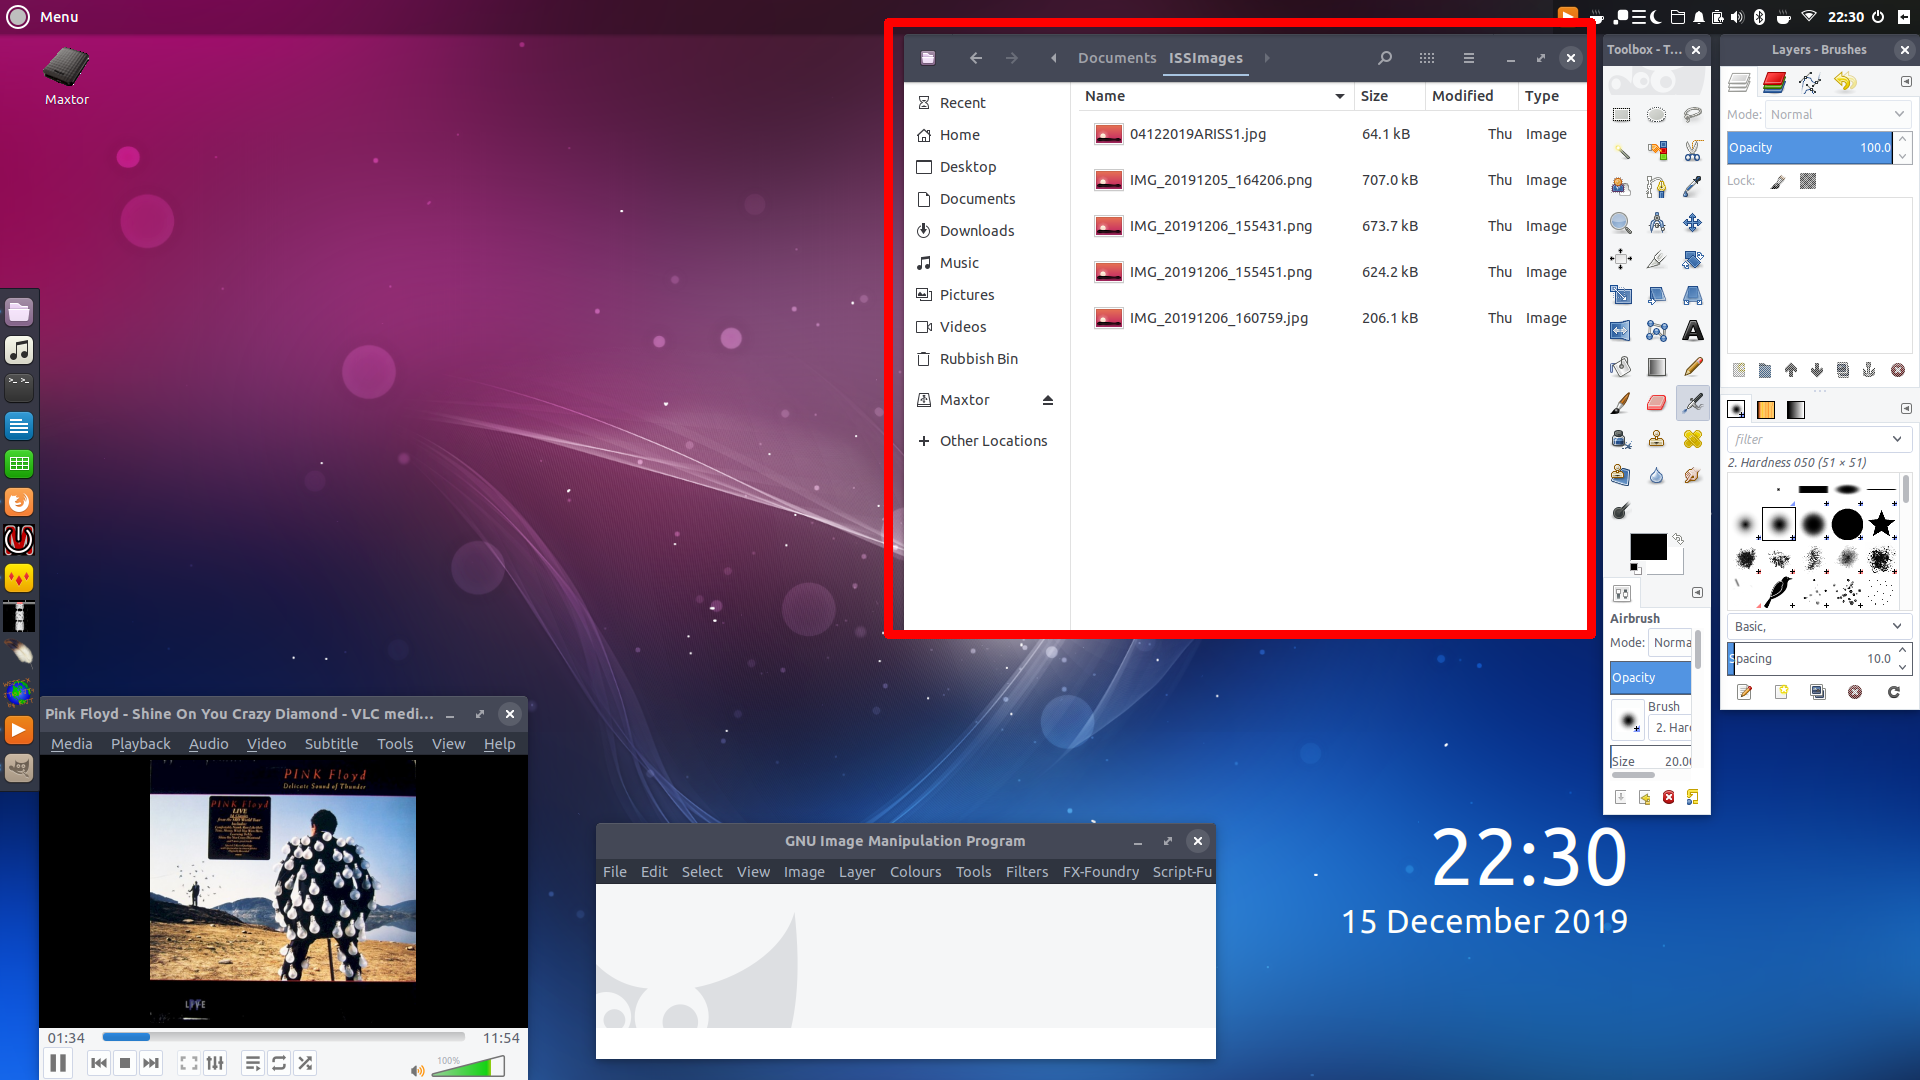
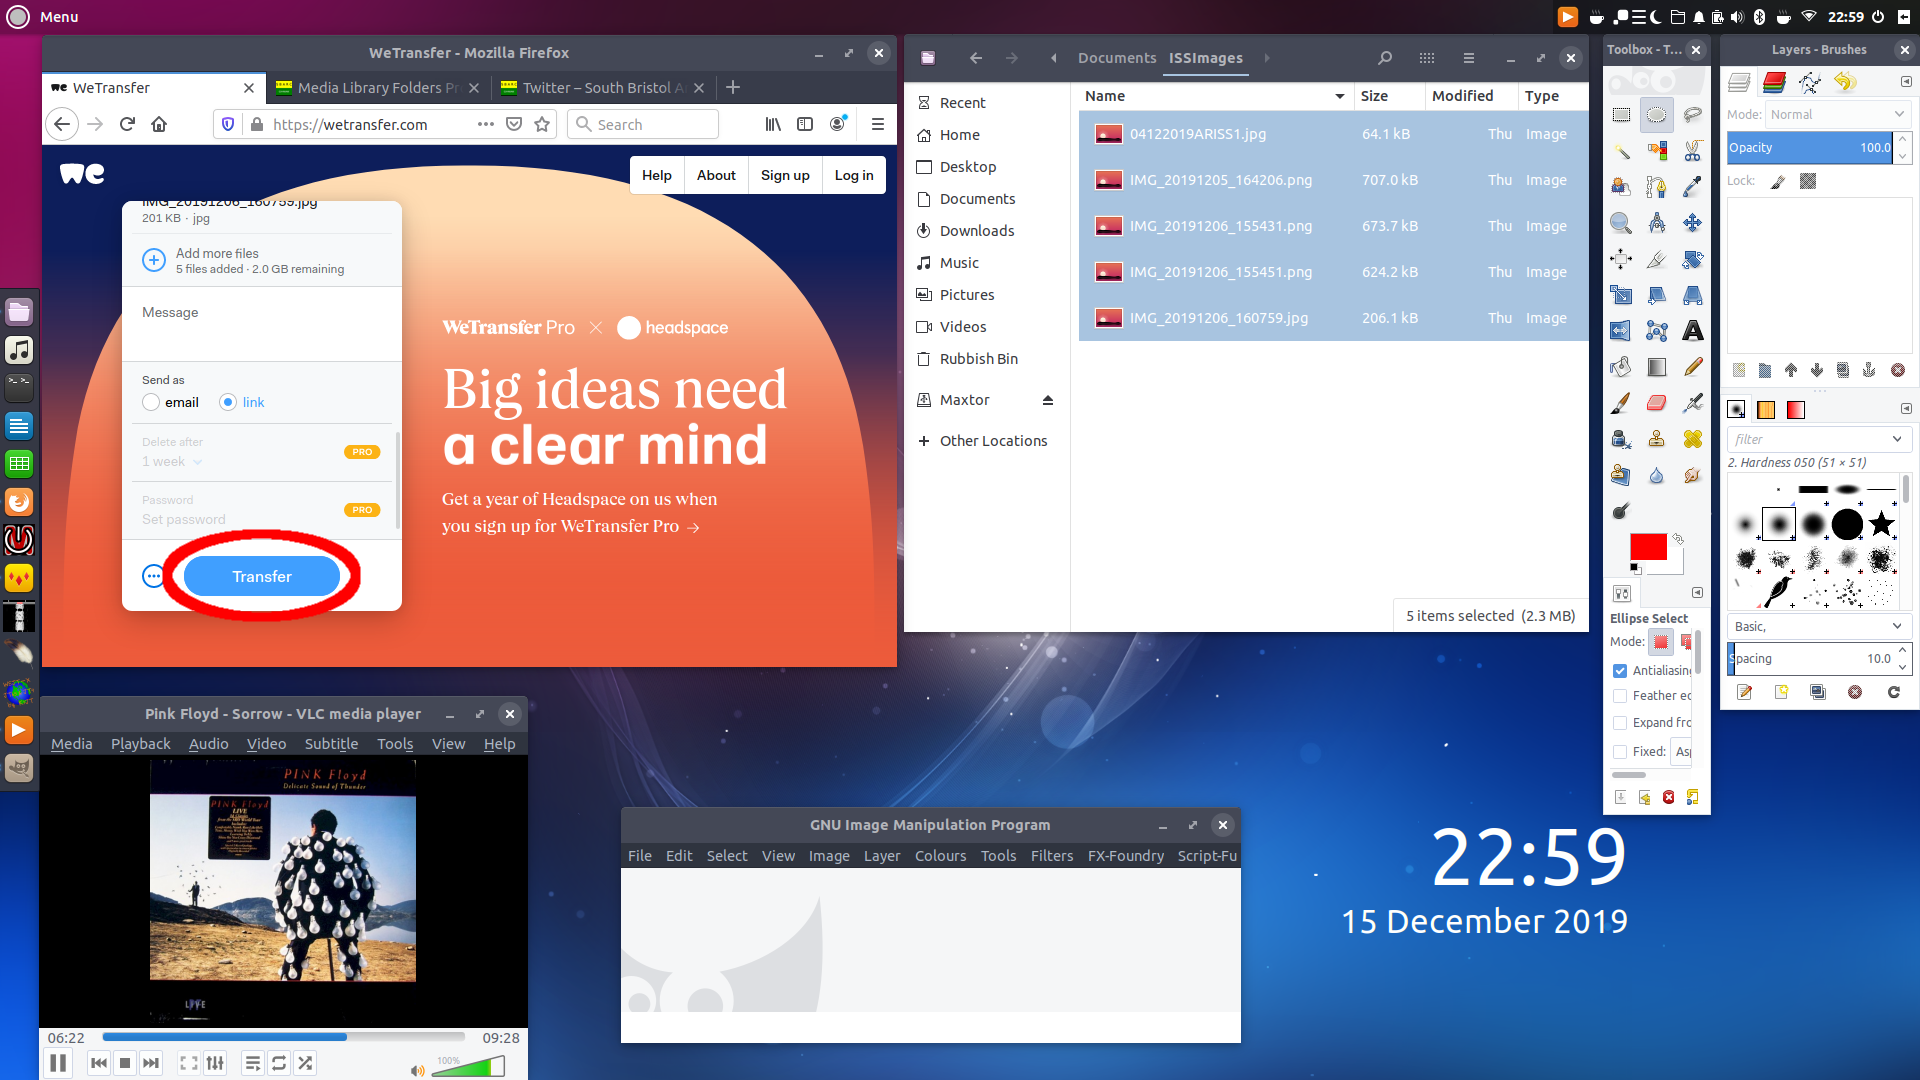
- Open a file manager and navigate to the directory where the files you wish to transfer are stored. In this example there are 5 images received from the ISS in one of the SSTV sessions, they are stored in ~/Documents/ISSImages
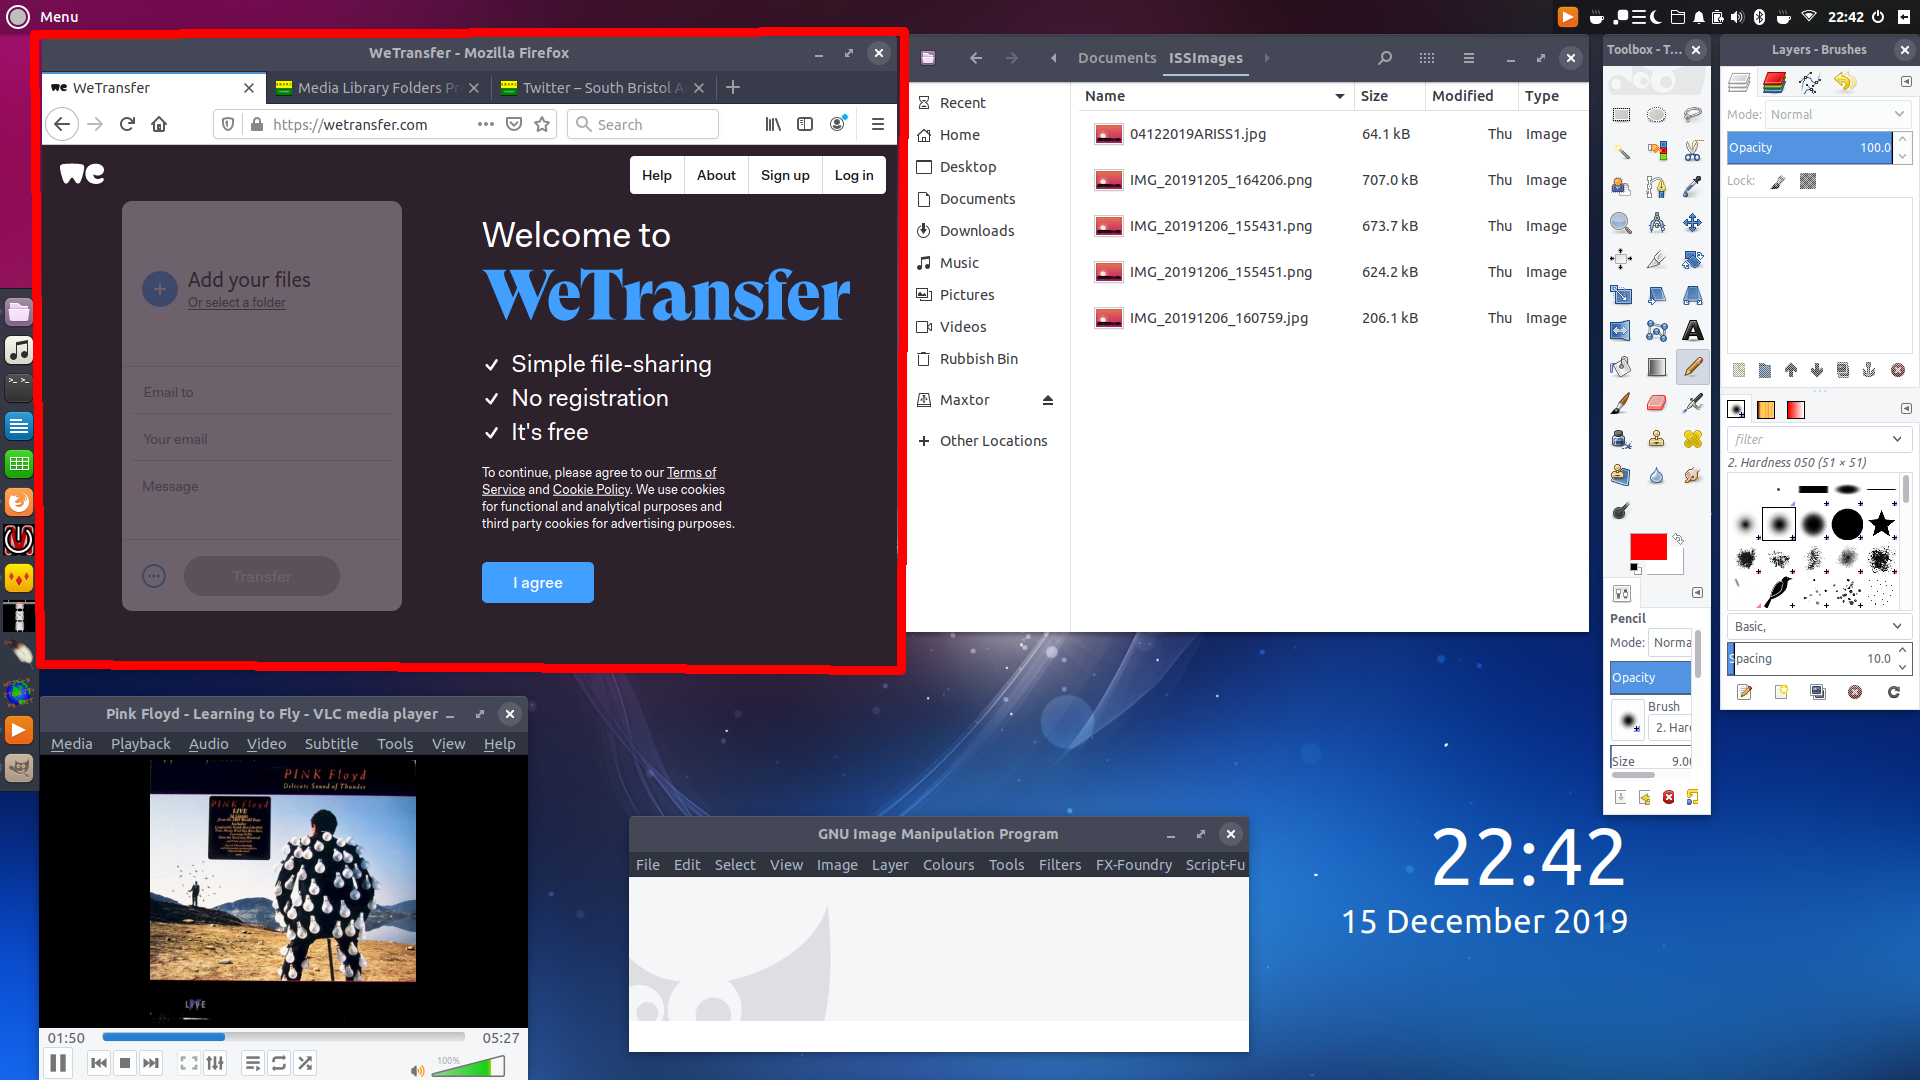
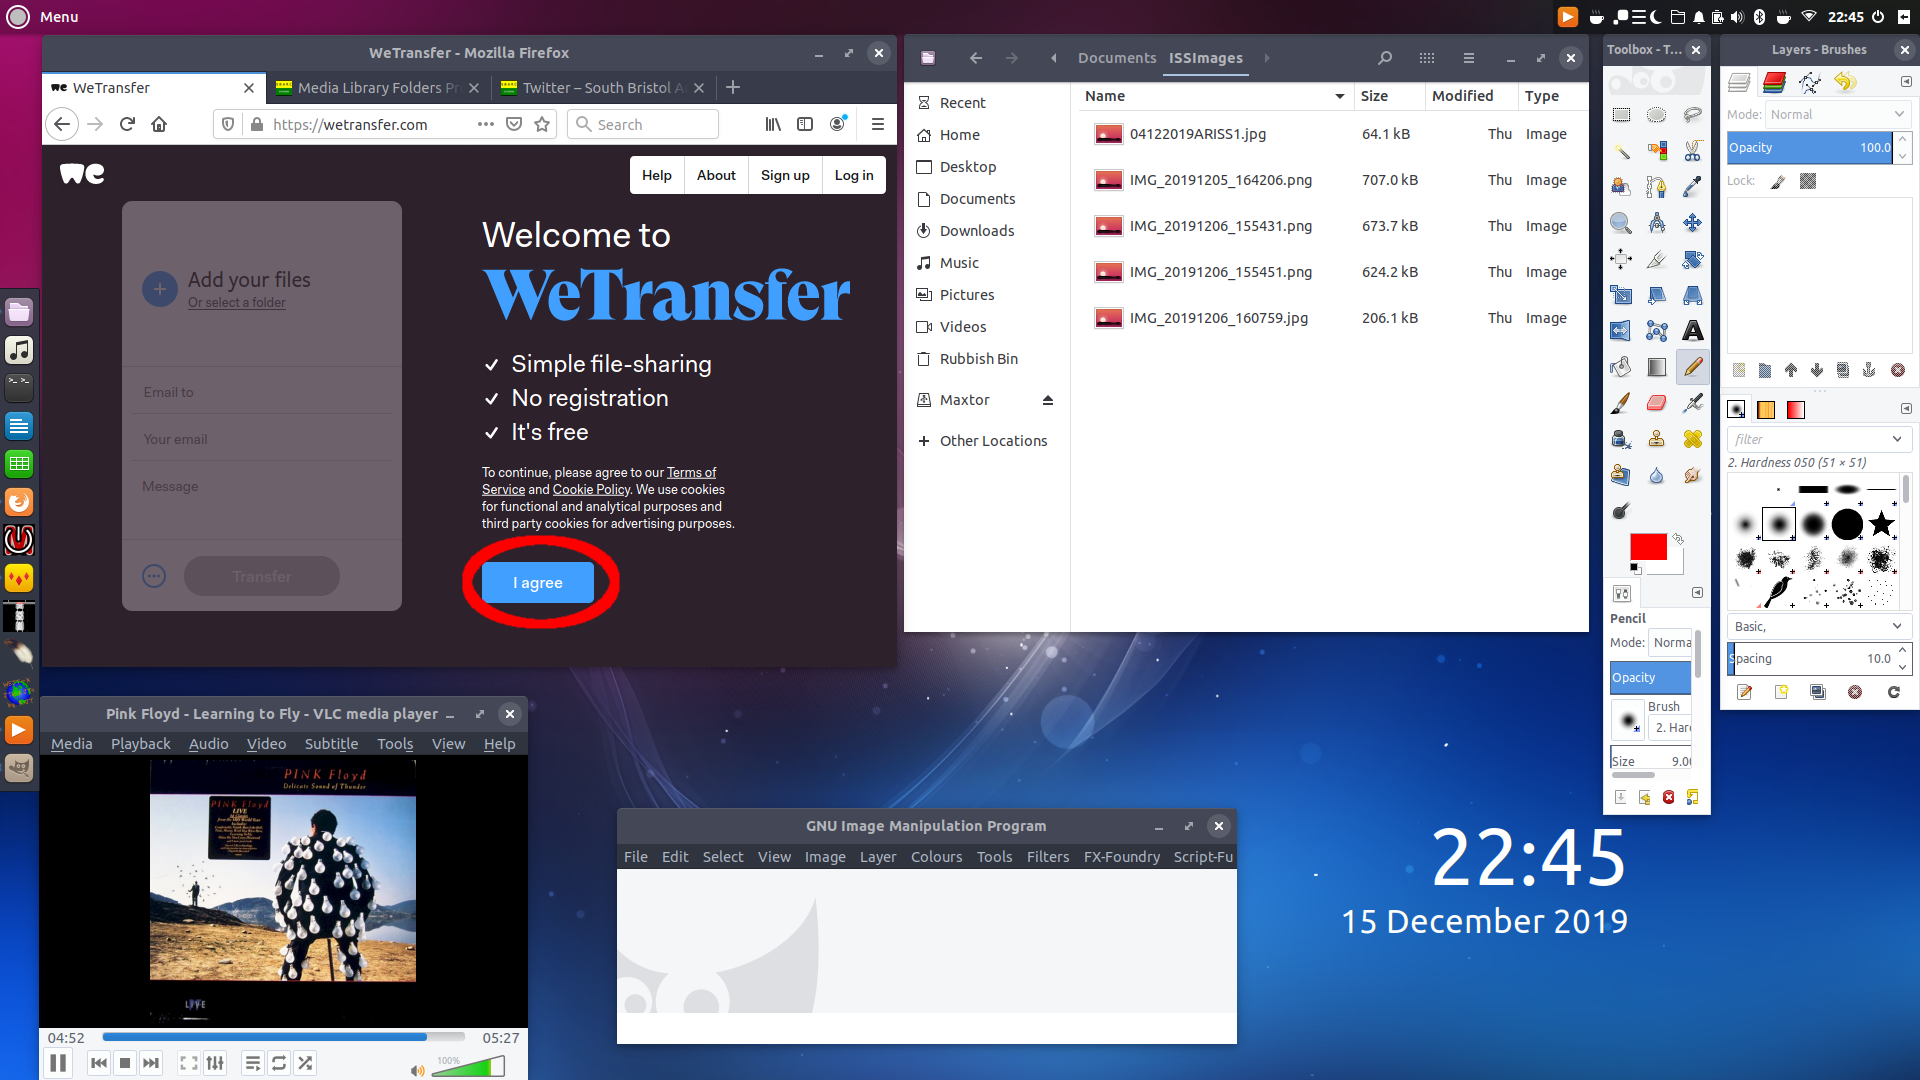
- Open your web browser of choice: Chromium, Chrome, Vivaldi, Opera, Firefox, Safari, Silk etc. Navigate to https://wetransfer.com
- Click on “I Agree”
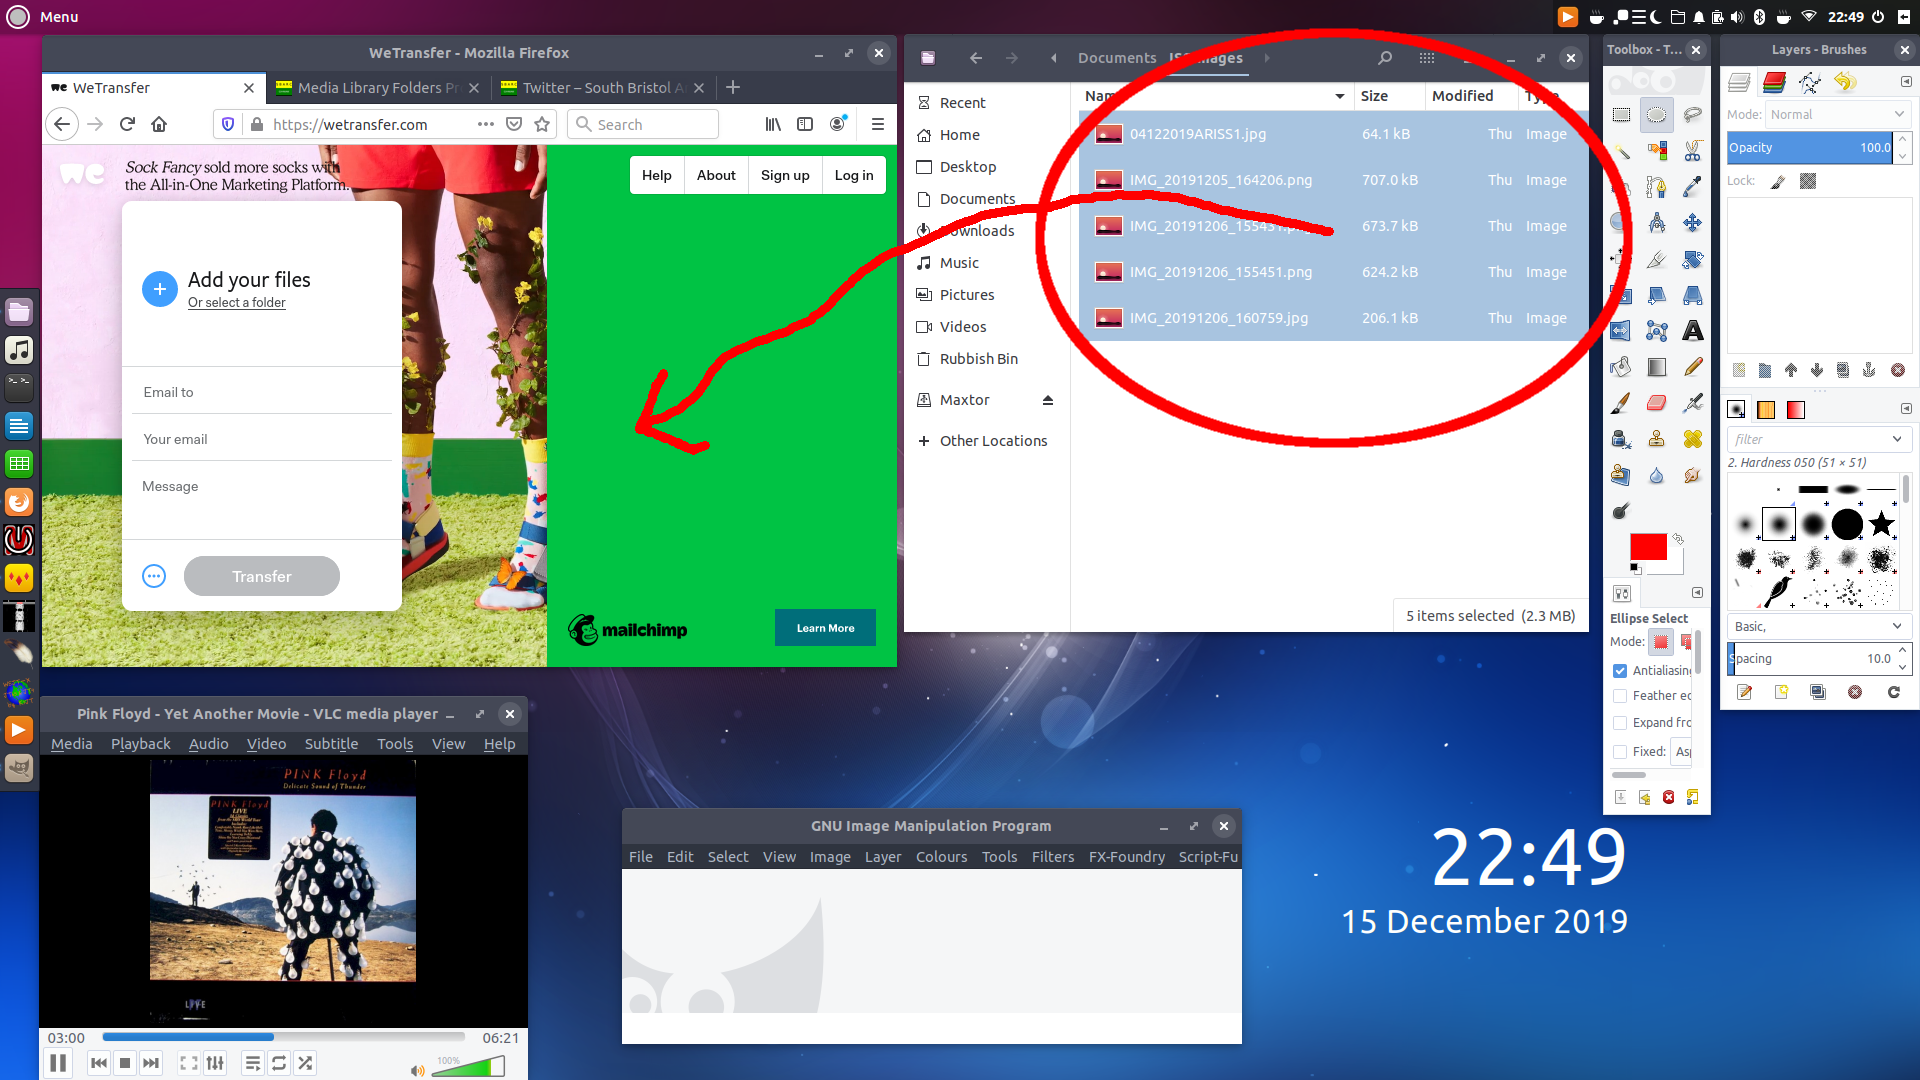
- Highlight the files you want to transfer in your file manager window and drag them to the WeTransfer window
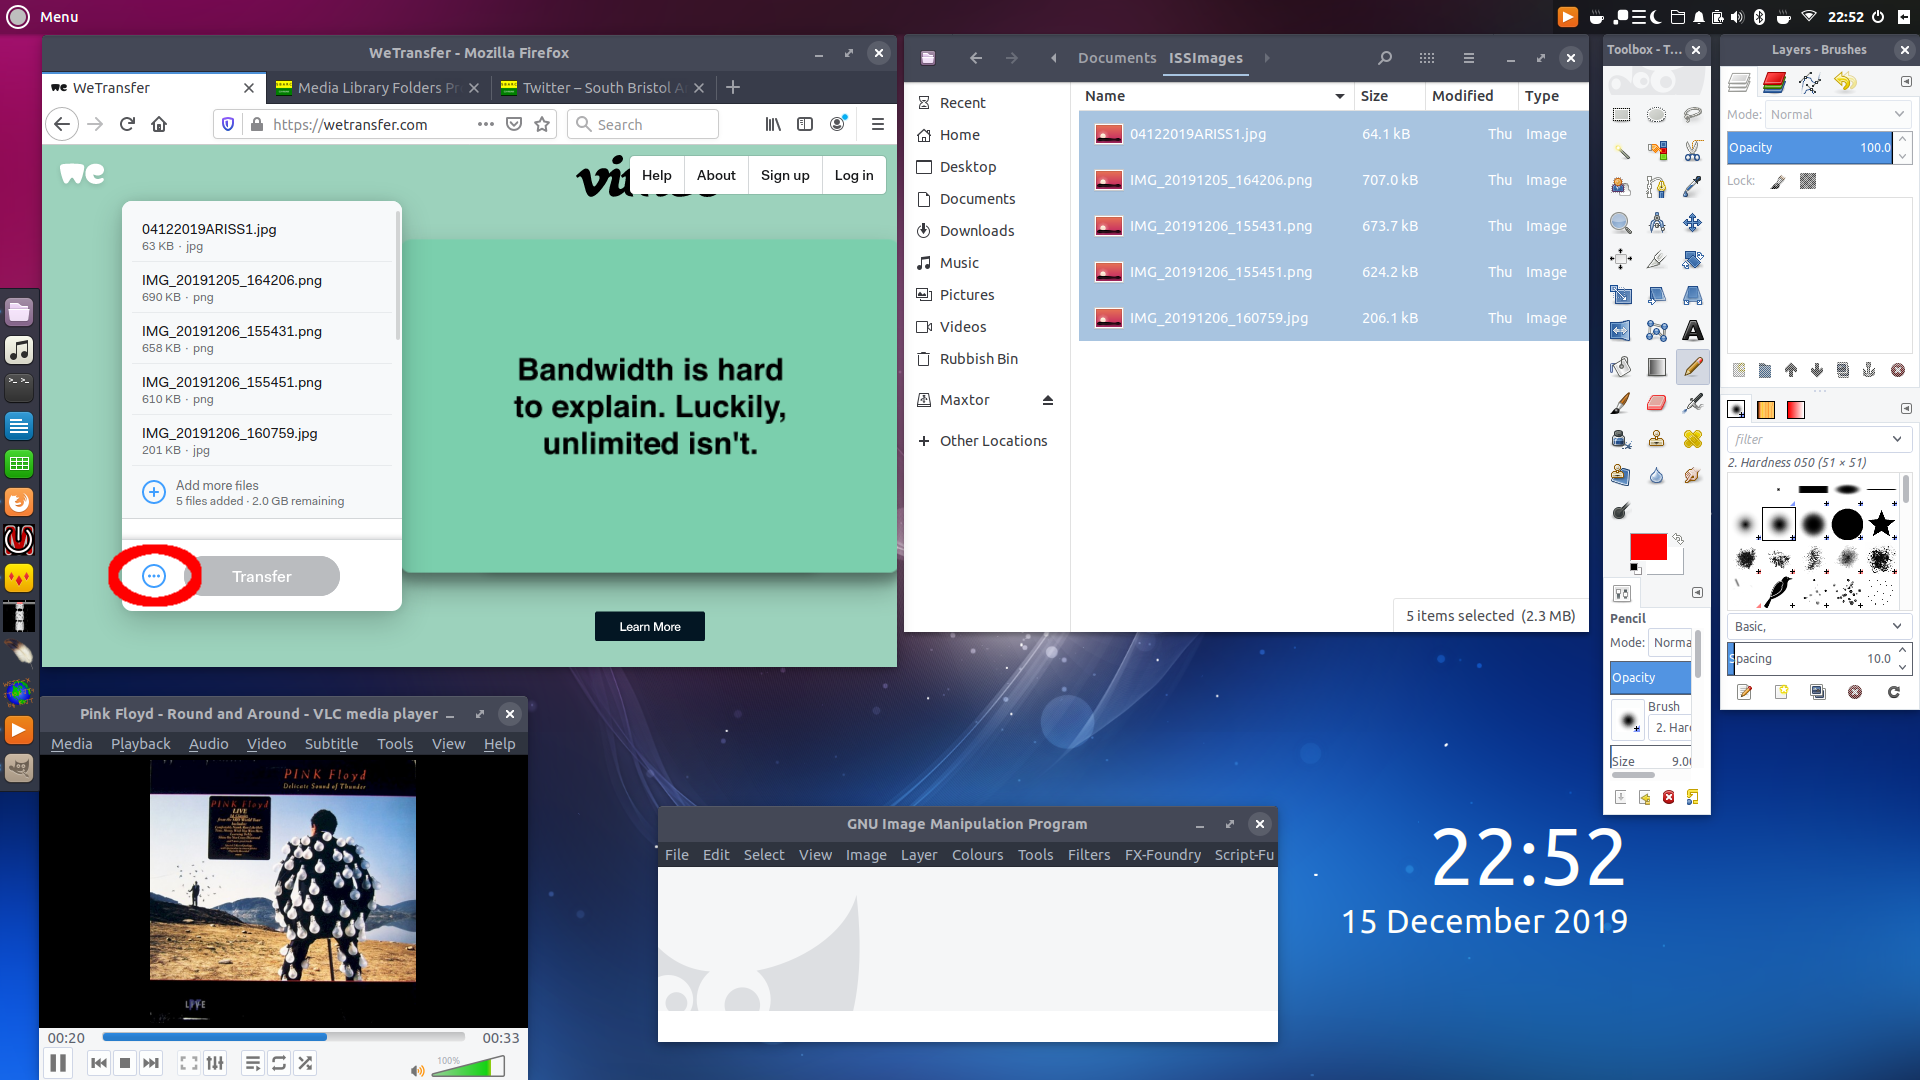
- Assuming your “Drag and Drop” went to plan you should see a list of the files you are going to transfer at the top of the white box on the WeTransfer page. If you want to add more files from other directories to the transfer then in your file manager navigate to the next directory and repeat the step above. When you have completed listing all of the files you wish to transfer click on the circle with 3 dots within it next to the “Transfer” button
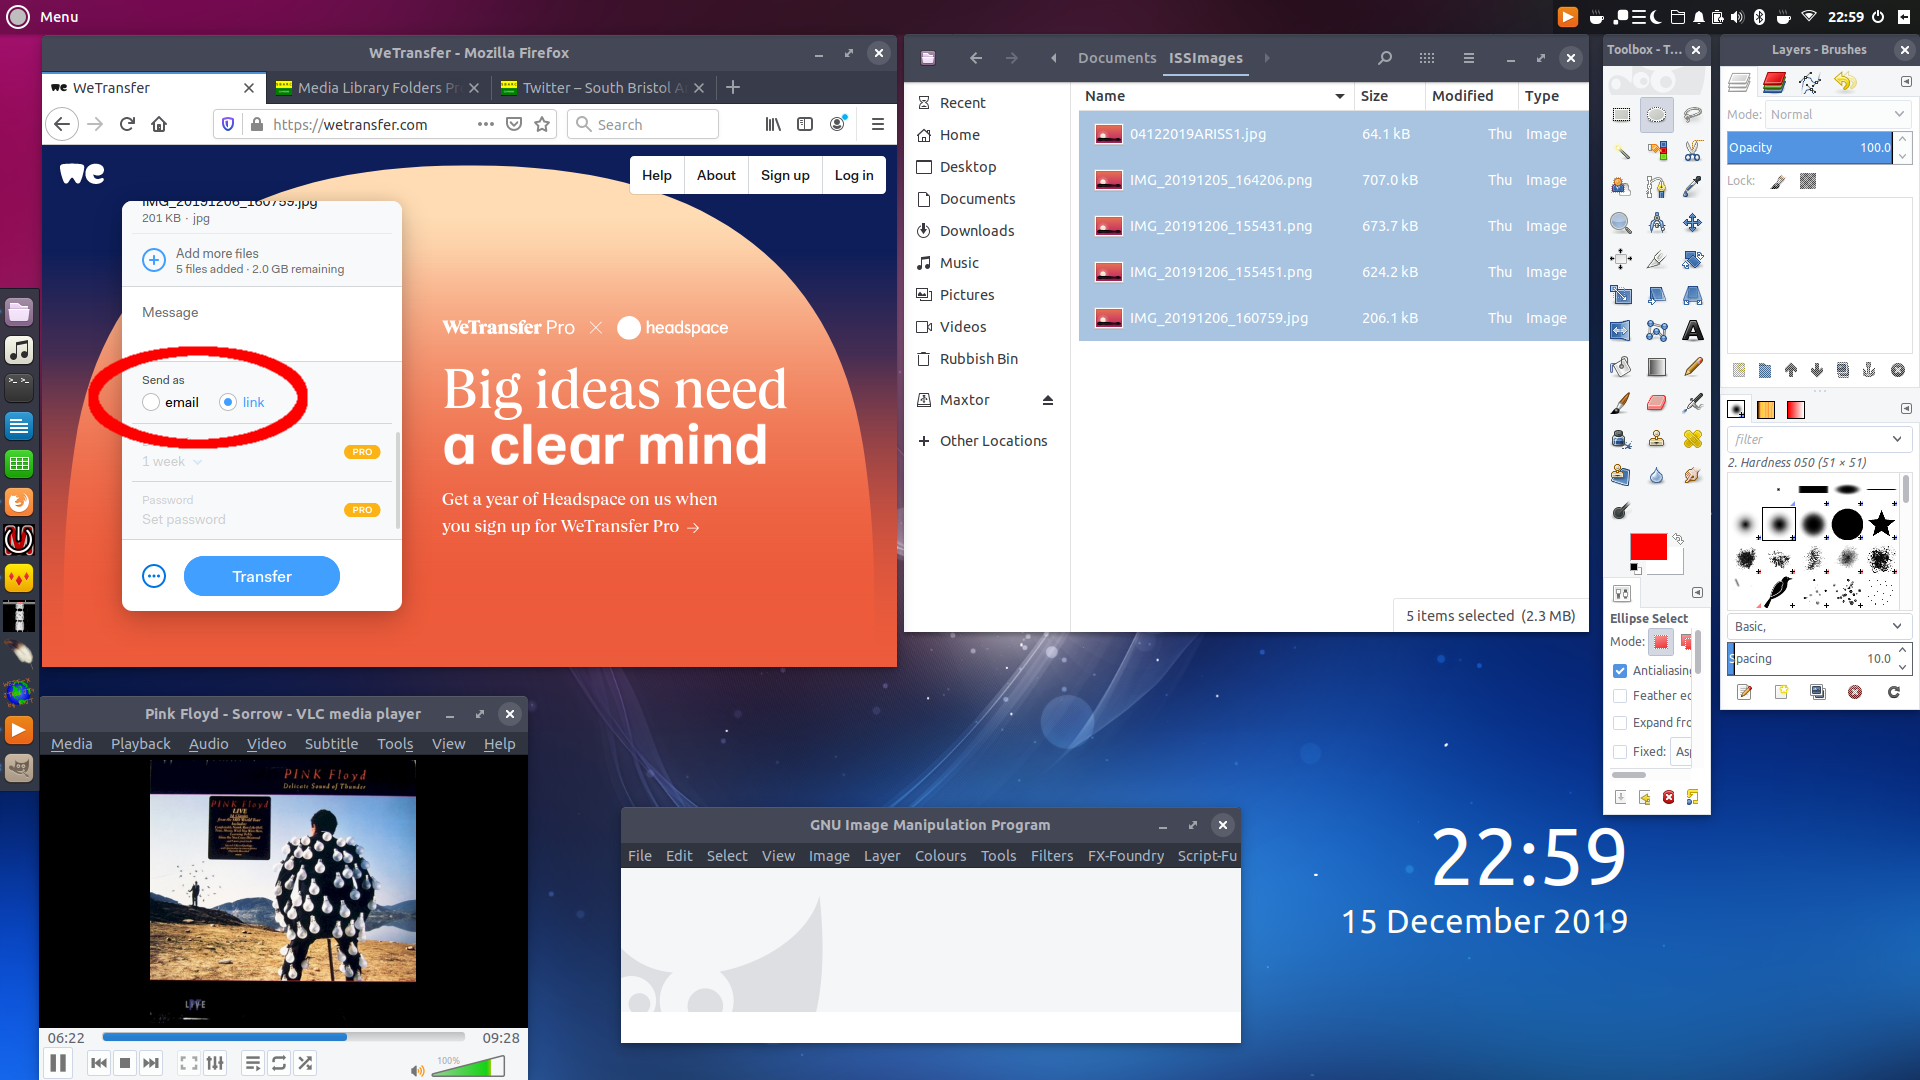
- In the settings box that is opened change “Send As” from E-Mail to Link, this is not essential but it avoids you having to mess about with e-mail addresses outside of your normal e-mail program and allows you to use links within a Groups.io thread
- Click on “Transfer” and wait for the upload to complete
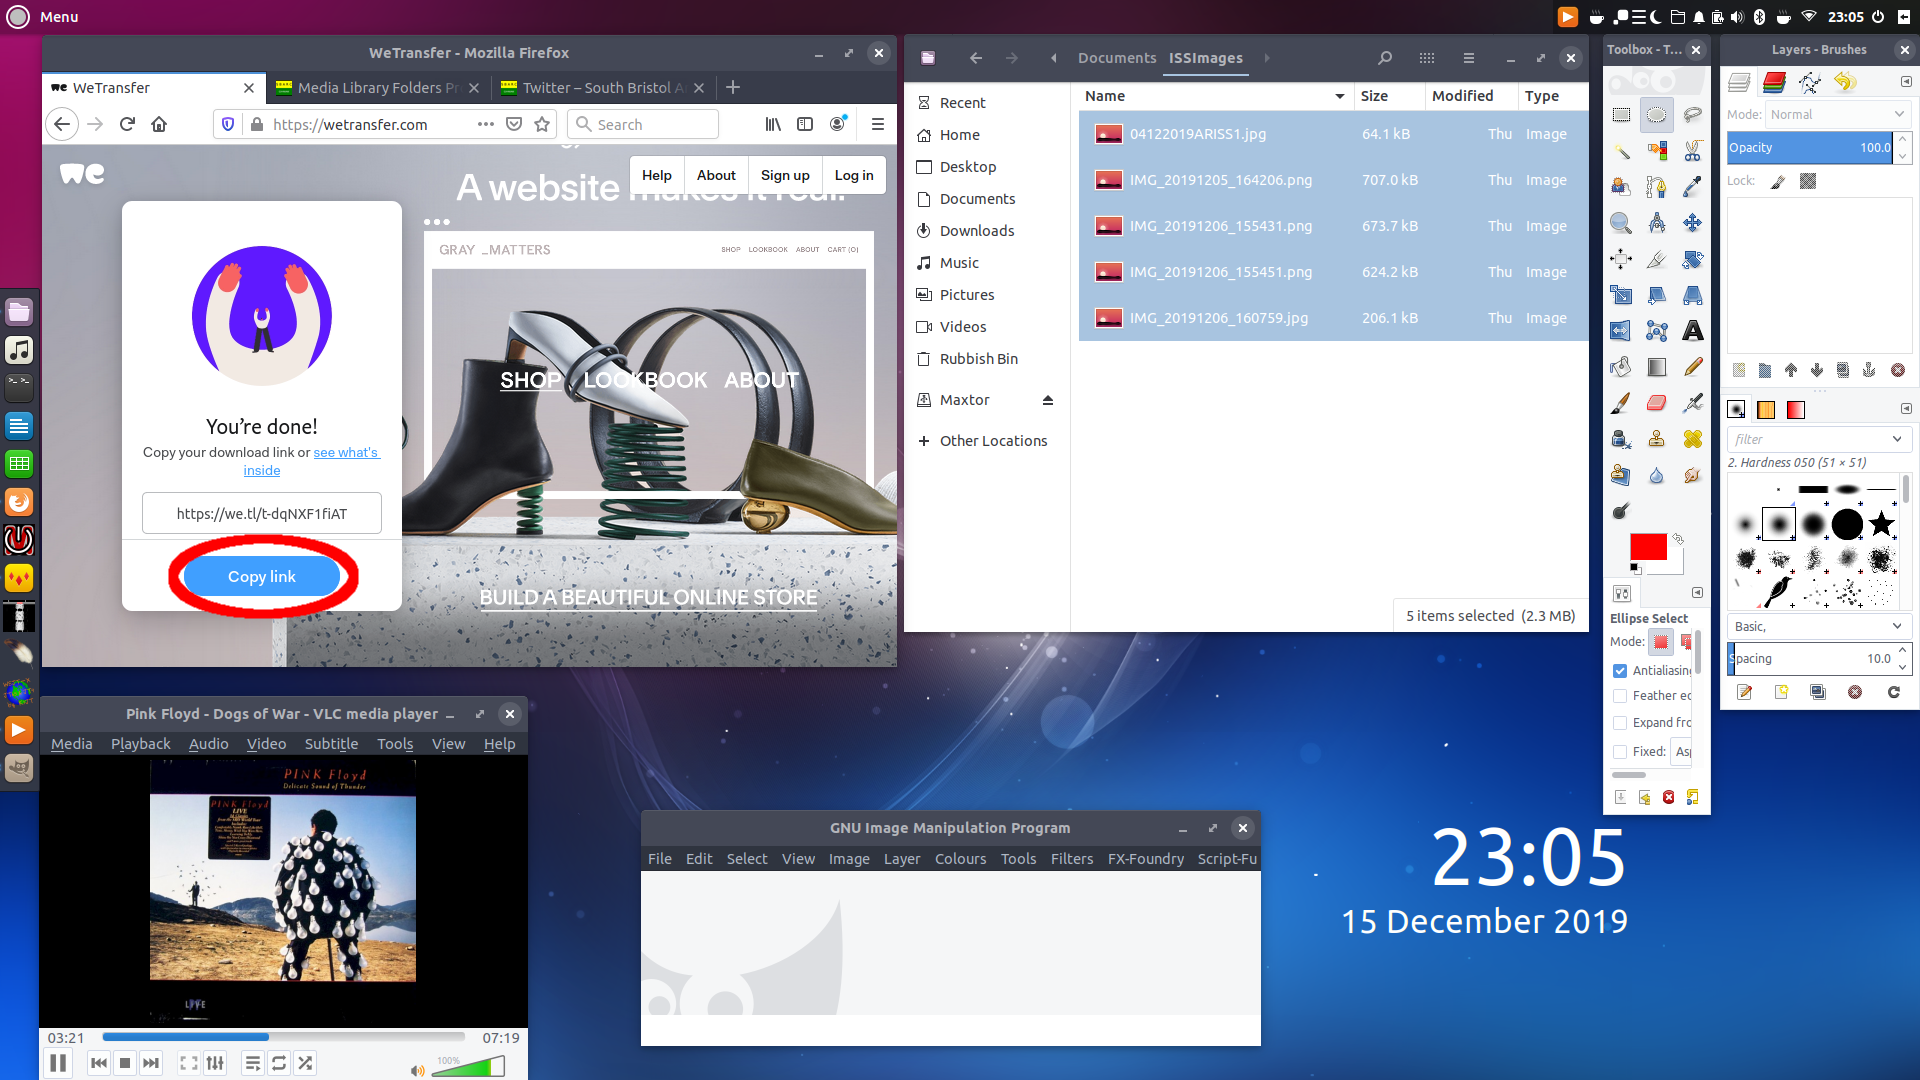
- Once complete you will be shown the link to your uploaded files; either highlight the link and copy it manually or click on the button labelled “Copy Link”
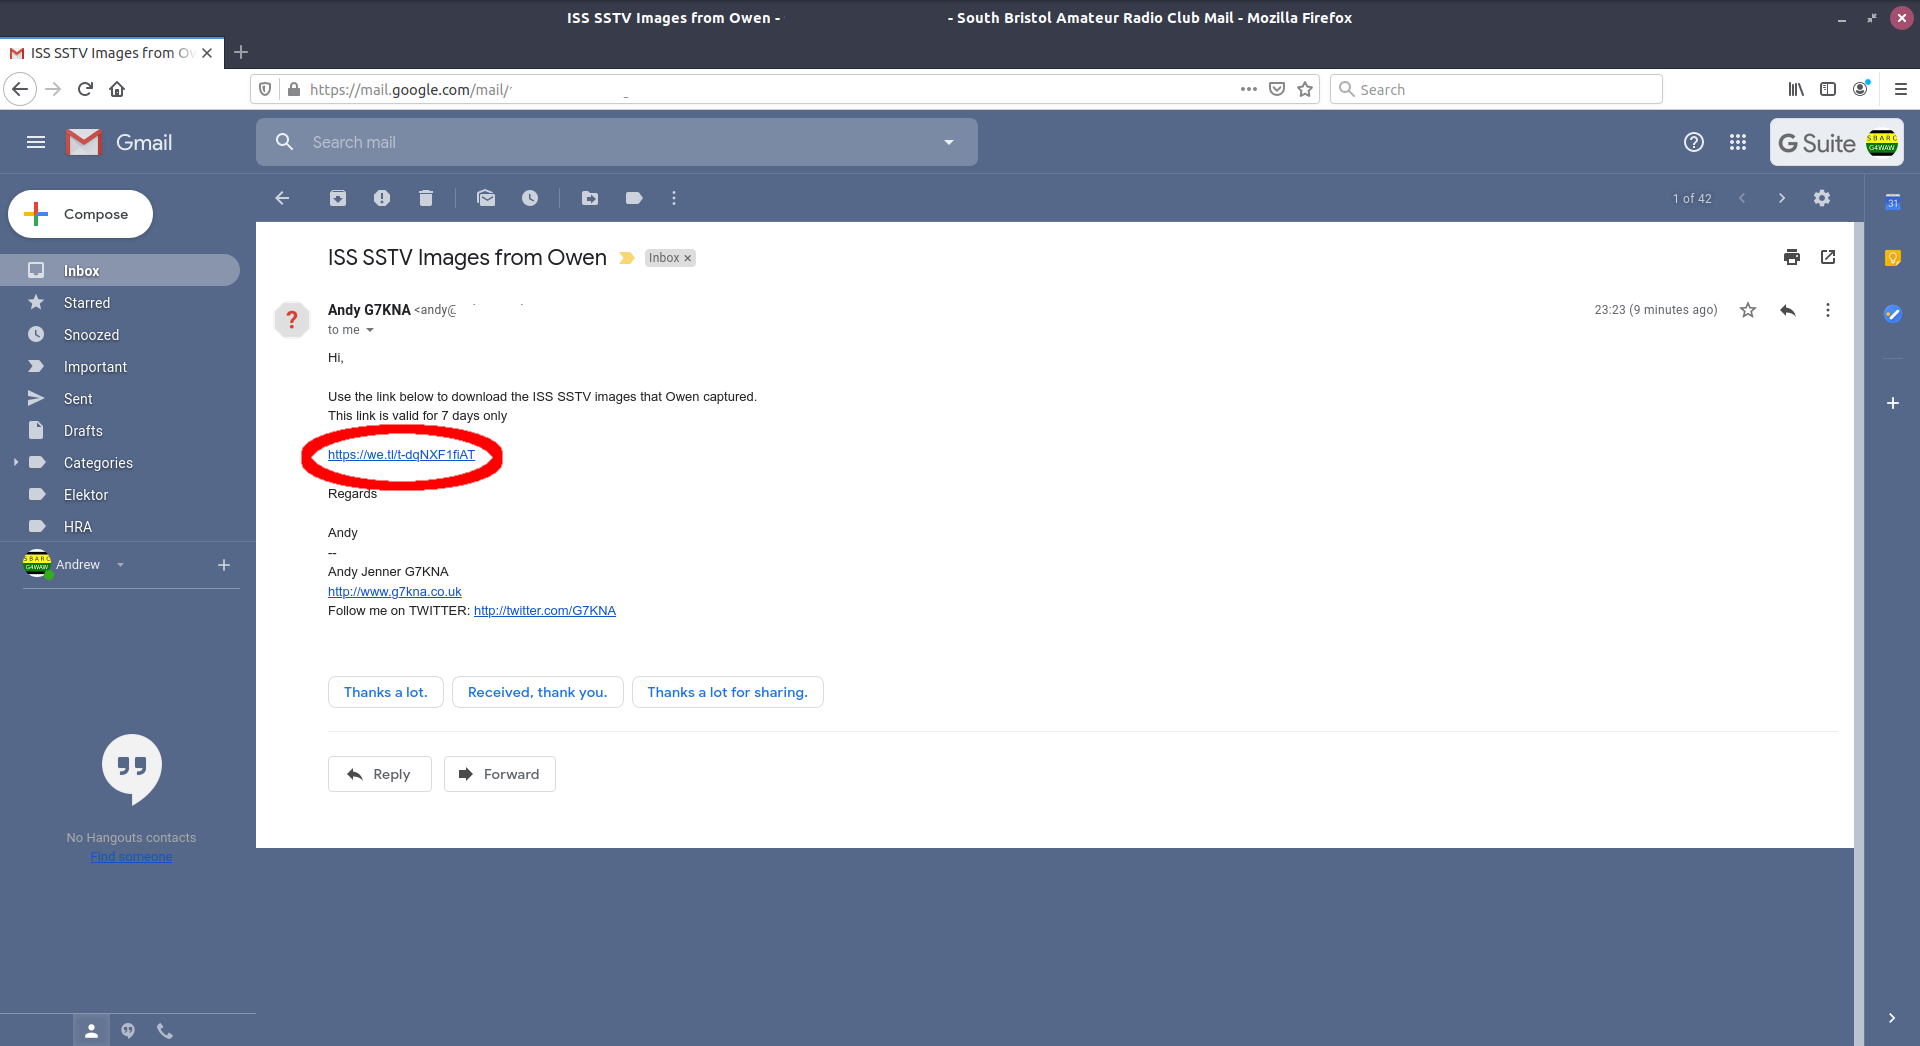
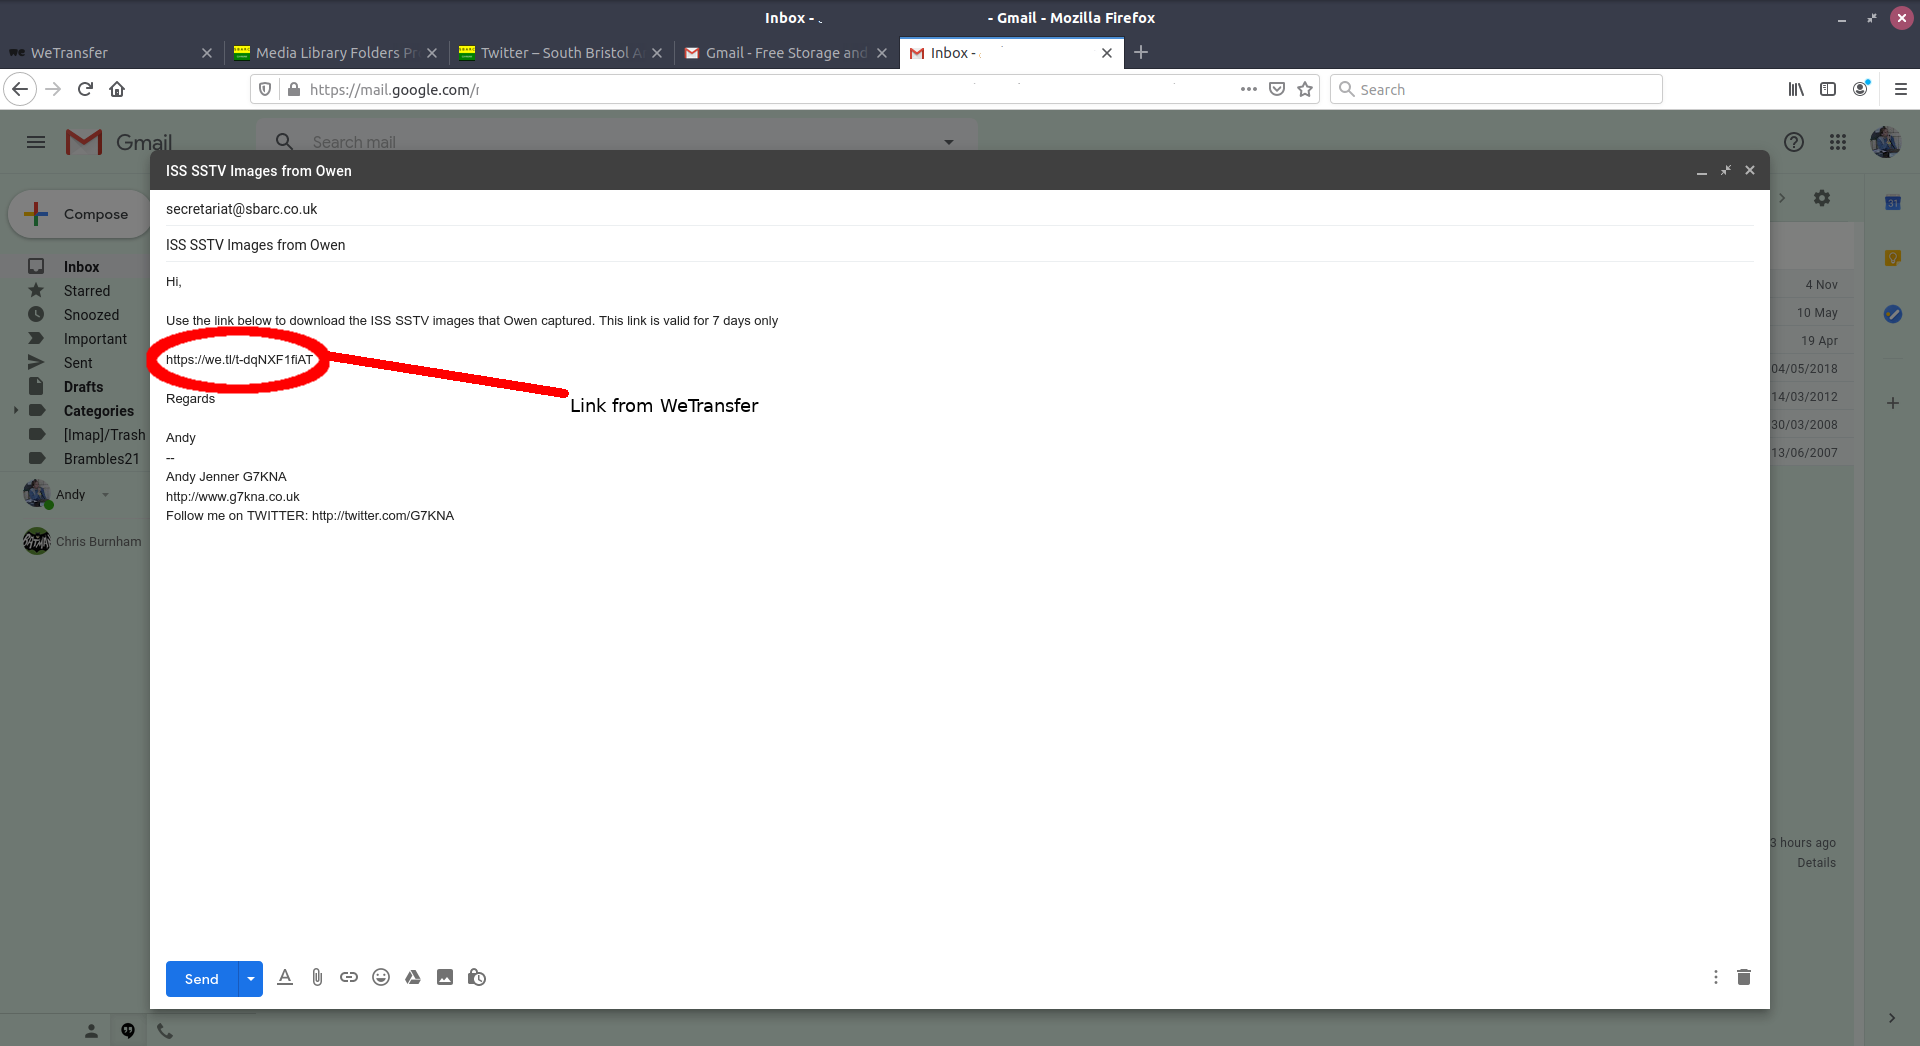
- Send the copied link to whomever you wish to share the files with by E-Mail, IM, Text Message or other messaging system of your choice. In the image below the link is being sent to the Club Secretary by E-Mail
- Bob’s your uncle, your files are in the ether ready for download for the next 7 days!
Downloading Files from WeTransfer
So if you receive a communication with a WeTransfer link in it, what do you do? Well in short if you are interested in the content and you are within the 7 day time limit then you download the content by following the steps below:
- If you trust the sender and are expecting a link from them click on the link in the e-mail or other message format.
- This should automatically open the WeTransfer Download page in your default web browser, click on “I Agree”
- Click on “Download”
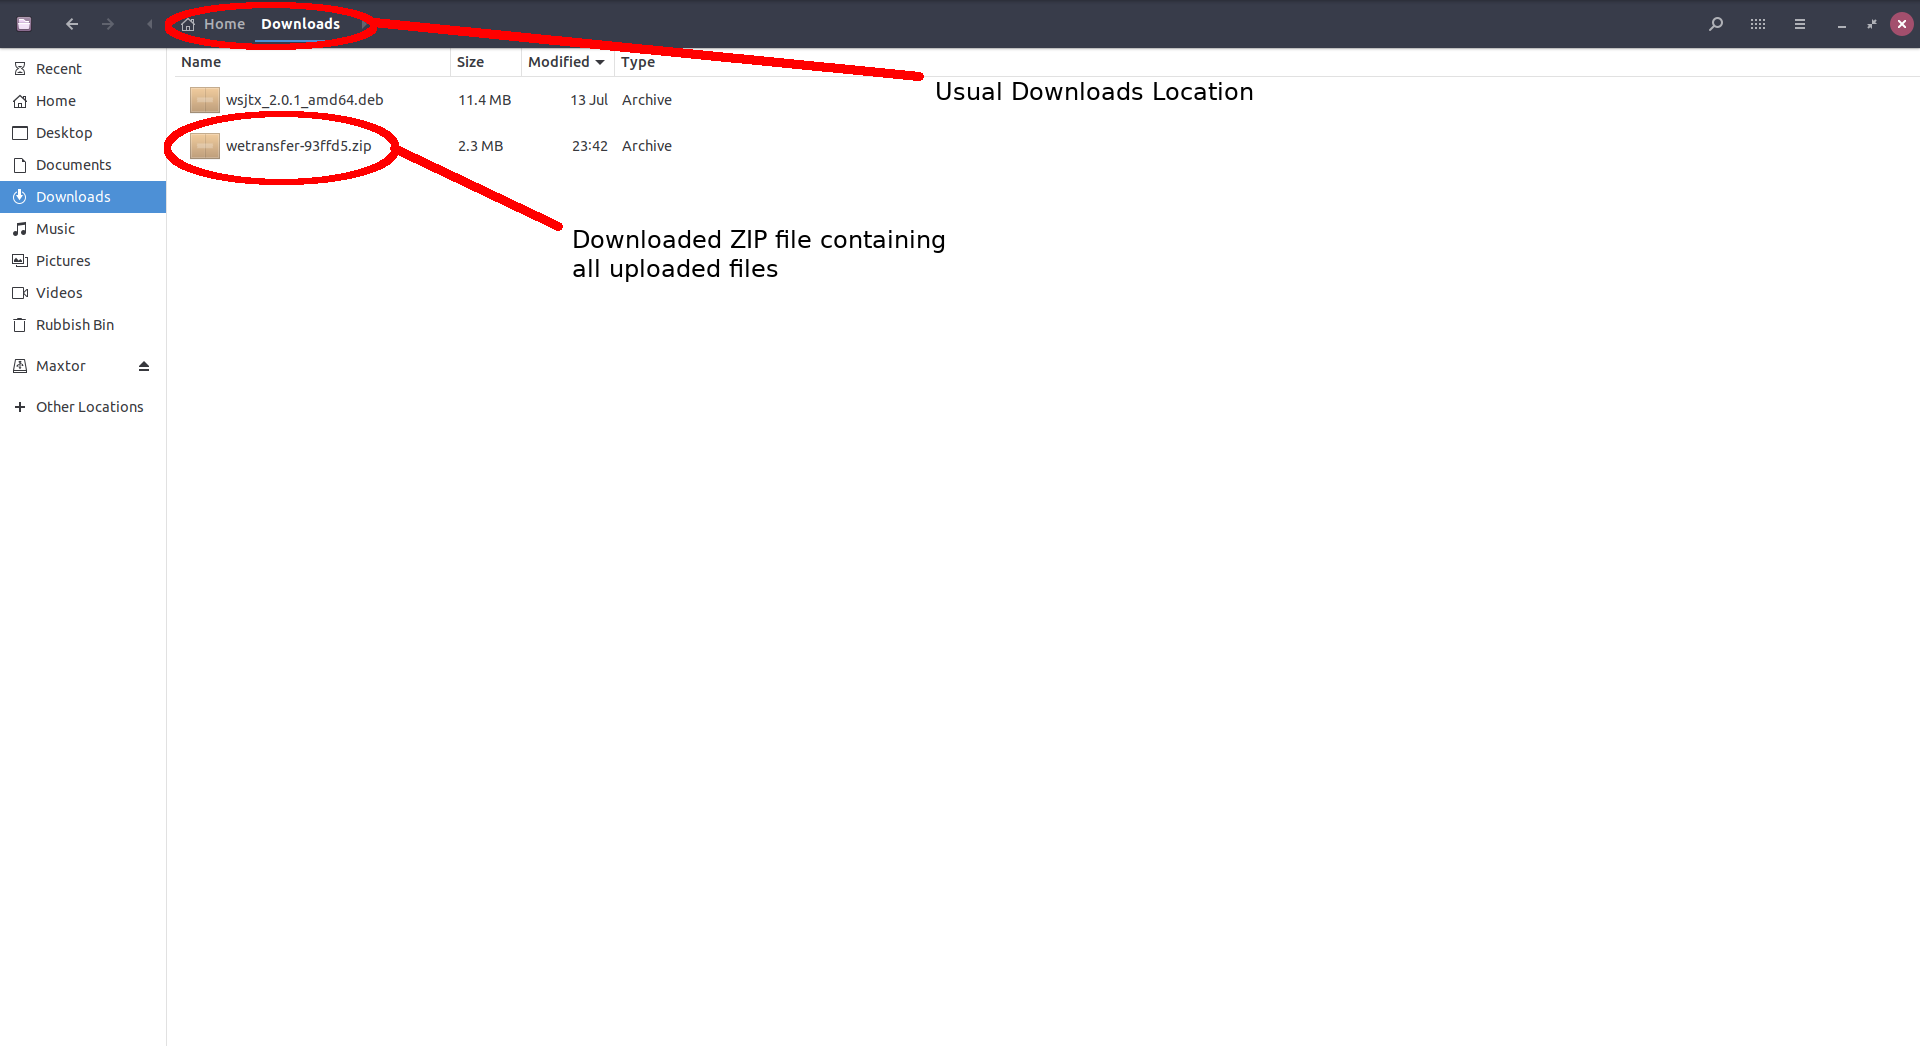
- The file will be saved on your device as a single ZIP file in your usual download location, from there you can extract in whatever way you normally do this to examine the contents.
